Installing Windows can be a daunting task for many users. Whether you're upgrading from an older version or setting up a new computer, understanding the installation process is crucial to ensuring a smooth experience. This guide aims to provide step-by-step instructions along with helpful tips to successfully install Windows on your system.
Before you begin the installation process, it's essential to meet certain prerequisites. Make sure you have the following items ready:

- Windows installation media (USB drive or DVD)
- A compatible computer with sufficient hardware specifications
- Backup of your important data
- Internet connection for updates (optional)
If you don't have installation media, you can create one easily using the Microsoft Media Creation Tool. Here’s how:

- Visit the official Microsoft website and download the Media Creation Tool.
- Run the tool and select "Create installation media for another PC."
- Choose the language, edition, and architecture (32-bit or 64-bit).
- Select "USB flash drive" or "ISO file" as your media type.
- Follow the prompts to complete the creation of your media.
Before proceeding with the installation, it's critical to ensure that your computer meets the minimum system requirements for Windows. Generally, the requirements are as follows:
- Processor: 1 GHz or faster with at least two cores on a compatible 64-bit processor or system on a chip (SoC)
- RAM: 4 GB or more
- Storage: 64 GB or larger storage device
- Graphics card: DirectX 12 compatible graphics / WDDM 2.x
- Firmware: UEFI, Secure Boot capable
- TPM: Version 2.0
- Internet connection: Internet functionality requires an Internet service provider subscription.
Once you have the installation media ready and your system meets the requirements, it's time to start the installation:
- Insert the installation media into your computer and restart it.
- Press the appropriate key (usually F2, F12, DEL, or ESC) to enter the BIOS/UEFI setup.
- Set the boot order to prioritize the USB drive or DVD.
- Save the changes and exit the BIOS/UEFI.
- Your computer will boot from the installation media.
During the installation process, you will be prompted to choose an installation type. You typically have two choices:
- Upgrade: This option is suitable if you want to keep your files and applications from the previous Windows version.
- Custom: This option is recommended if you want a fresh installation. You can also partition your drive here.
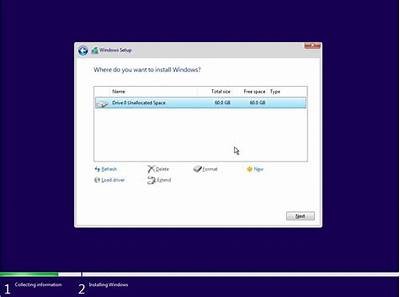
If you select the "Custom" installation type, you'll be taken to a screen where you can manage your partitions. Important actions include:
- Deleting existing partitions (be cautious, as this will erase data).
- Creating a new partition for Windows.
- Format partitions if necessary, especially if you're re-installing.
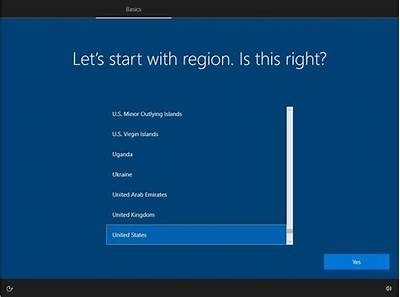
After partitioning, the installation process will begin. This step may take some time, and your computer might restart several times. Make sure to follow the on-screen instructions:
- Choose your region and language settings.
- Accept the license agreement.
- Log in using your Microsoft account or create a local account.
- Customize your settings such as privacy, location, and diagnostic data.
After Windows installation is complete, there are a few important steps to consider:
- Check for Windows updates to ensure your system is up to date.
- Install necessary drivers for your hardware components.
- Restore backup files if you performed a custom installation.
- Install software applications that you need for daily tasks.
Here are some tips to facilitate a smoother installation:
- Read Microsoft’s documentation and instructions carefully.
- Ensure your computer is plugged in during installation to avoid power interruptions.
- Have necessary product keys ready if prompted during installation.
- Remember to back up essential data before proceeding with installation.
If you encounter issues during installation, consider the following troubleshooting steps:
- Check your installation media for errors, using another USB drive if necessary.
- Make sure your BIOS/UEFI settings are configured correctly.
- Disconnect any unnecessary peripherals and try again.
- Consult the Microsoft support page for specific error codes and solutions.
Installing Windows can be an intimidating process, but with the right preparation and knowledge, you can navigate it successfully. Always ensure to back up your data and verify system compatibility before you begin. By following the steps outlined in this guide, you should be well on your way to enjoying your new Windows experience. Tags